Pressure Profiling at Home (Espresso): 2026 Guide
- Pressure profiling means varying the pressure on the puck during a shot instead of holding a flat 9 bar: gentle pre-infusion, extraction peak, then decline.
- Do not confuse pressure (in bar, the force on the puck) with flow (in ml/s, the water volume): an E61 paddle sets flow, not real pressure.
- Affordable genuine pressure profiling: Cafelat Robot (~419 EUR, manual with gauge) and Flair 58 (~630 EUR, 58 mm lever).
- Programmable, repeatable profiling: Decent DE1 Pro (~3700 EUR).
- Framed correctly: Lelit Bianca = flow control, not pressure; Sage Dual Boiler and Linea Micra = pre-infusion only, not full profiling.
At what point in the shot does each pressure segment hand over to the next?
Pre-infusion hands over the moment the puck is saturated and pressure starts climbing. The ramp hands over as soon as you reach the target, the plateau holds the middle of the shot and runs longest, and the decline takes the tail before you cut. Across a 25 to 30 second extraction those four segments never overlap: each one owns its own slice of time, and each one leaves a different mark on the cup. Pressure profiling means varying the pressure applied to the coffee puck from one segment to the next, rather than holding it flat at 9 bar from the first drop to the last. That is the gap between a standard cafe machine, which simply sits at 9 bar throughout, and a barista who shapes the force across the shot to coax out exactly what they want in the cup. I still remember the first time I pulled a shot on a lever and felt the resistance change under my hand: it was the moment espresso stopped being a button and became a dial.
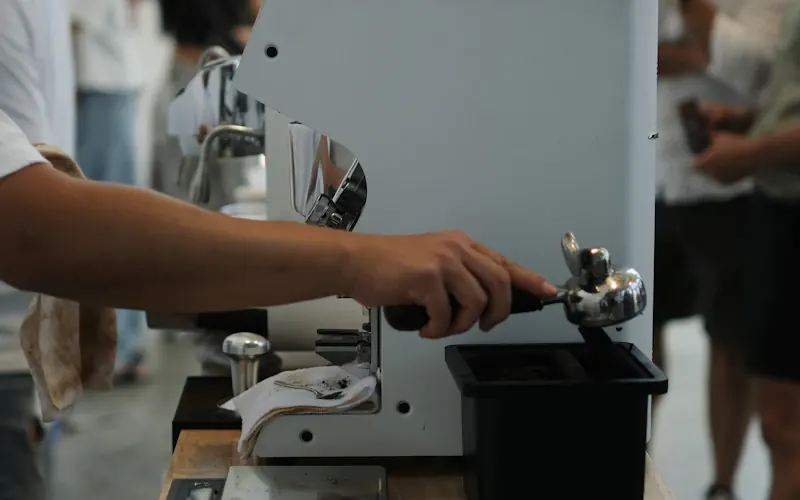
Segment by segment, here is what each one builds. First comes pre-infusion: a gentle phase, somewhere between 1 and 4 bar, that wets and swells the puck slowly. It lets the coffee saturate evenly before the pressure climbs, which cuts down on channelling, where water races through weak spots in the bed. Then comes the ramp: how fast you reach the target matters as much as the target itself, because a brutal climb onto a puck that is still half dry opens exactly those channels. Next the plateau, usually between 6 and 9 bar and held as long as the shot needs, the working heart of the extraction where aromatics and oils are drawn out. Finally the decline: you let pressure fall toward 4 or 5 bar over the tail of the shot, stopping short of the bitter compounds that creep in at the end and preserving sweetness.
Why does this change the cup? Because a flat 9 bar is a compromise inherited from 1960s Italian espresso, calibrated for dark roasts and brisk service. On today's lighter, more acidic specialty coffees, that compromise is not always ideal. A careful pre-infusion and a measured decline give a more even extraction, cleaner acidity and less stray bitterness. Profiling does not replace a good grind or a fresh bean, but it adds a lever of control that flat pressure simply cannot offer.
What exactly moves when you open an E61 paddle?
The flow moves. The paddle opens a valve, so what you are setting is millilitres per second, and the bar showing up in the basket is simply the puck's answer to that flow. Both are genuine quantities you can drive: pressure profiling controls the force on the puck, measured in bar, while flow profiling controls the volume of water passing through the puck per second, measured in millilitres per second. The two are linked through the puck's resistance, but they are not interchangeable, and knowing which one is under your hand decides how you can work each segment.
Take an E61 paddle machine like the Lelit Bianca. Its paddle acts on a needle valve that restricts the flow upstream of the puck. So you are setting a flow, and the pressure on the puck follows indirectly: the pump always pushes toward its maximum, and it is the combined resistance of the coffee and the valve that sets the real pressure. That is genuine flow control, and it is enormously useful, but it is not pressure profiling in the strict sense: you do not read or steer the bar in the basket directly.
By contrast, a Cafelat Robot fitted with its gauge shows you the real pressure measured in the basket, and you drive it directly with the force of your arms. That is true pressure profiling. The Decent DE1 Pro goes further still, measuring and electronically holding a target pressure at every instant: pressure profiling in its most refined and repeatable form. Remember the simple rule: if the machine lets you set a flow or a valve opening, that is flow; if it lets you target a pressure in bar, that is pressure.
Can a home machine shape the whole curve, or just its first seconds?
Only two kinds of machine reach the whole curve: a manual lever, where your arm owns all four segments, and a programmable machine that holds a written curve and replays it shot after shot. Everything else stops after the opening seconds, because adjustable pre-infusion gives you the first segment and then the pump locks the plateau at 9 bar, leaving the ramp and the decline out of reach. Here are the realistic options for pressure profiling at home in 2026, with a clear line drawn between genuine pressure profiling and what is not (but is often sold as such). Prices are indicative, verified at European retailers in euros, and shift with stock and promotions.
| Machine | Pressure mechanism | Indicative price (EUR) | Level | Buy |
|---|---|---|---|---|
| Cafelat Robot (Barista) | Manual lever with gauge: real pressure read and driven by hand, pre-infusion included | ~419 EUR | Genuine pressure profiling (manual), affordable | Check price on Amazon |
| Flair 58 | Manual lever, standard 58 mm portafilter: pressure varies with the force you apply at the arm | ~630 EUR | Genuine pressure profiling (manual), 58 mm | Check price on Amazon |
| Decent DE1 Pro | Electronically held pressure, programmable and repeatable curves (0 to 9.5 bar), tablet control | ~3700 EUR | Genuine pressure profiling (programmable), reference | Sold direct from maker |
| Lelit Bianca | E61 paddle = flow control, pressure follows indirectly: not direct pressure profiling | Flow profiling | Frame correctly: flow, not pressure | Outside pressure scope |
| Sage Dual Boiler | Adjustable pre-infusion (time and pre-infusion pressure), then pressure locked at 9 bar: not full profiling | ~1000 to 1250 EUR | Pre-infusion only, set aside | Outside pressure profiling |
| La Marzocco Linea Micra | On/off paddle + built-in pre-infusion, then 9 bar: not pressure profiling in the strict sense | ~3332 EUR | Pre-infusion only, set aside | Outside pressure profiling |
* These links may earn a commission if you make a purchase, at no extra cost to you. Learn more.
In plain terms: for genuine pressure profiling at home, three machines keep the promise. The Cafelat Robot and the Flair 58 do it manually, by arm force, on a contained budget. The Decent DE1 Pro does it electronically, with savable and shareable curves, at a far higher price. The other models named are excellent machines, but the Lelit Bianca is flow profiling, and both the Sage Dual Boiler and the Linea Micra limit themselves to a pre-infusion phase before locking the familiar 9 bar.
Should a light roast get a longer pre-infusion and a later decline than a dark one?
Yes, and the gap is wider than most people expect. A light roast wants pre-infusion stretched to 8 to 15 seconds and the decline held back until the very end of the shot; a dark roast wants pre-infusion cut to 3 to 6 seconds and the decline started halfway through. Here are two starting points for getting to grips with a pressure curve. Adapt them to your bean, dose and grind, but they give a clear direction.
Light roast (filter roast)
A light roast resists extraction and needs more energy to release its sugars. Aim for a long pre-infusion, 8 to 15 seconds around 2 to 3 bar, to saturate the puck deeply. Then climb to a sustained peak of 8 to 9 bar and hold it to draw out the bright acidity and floral aromatics. A light decline at the very end is enough. Target a longer ratio, around 1 to 2.5, which develops complexity without tipping into sour under-extraction.
Dark roast (espresso roast)
A dark roast is more soluble and turns bitter quickly. Keep a short pre-infusion, 3 to 6 seconds, then work a declining pressure: a moderate peak around 6 or 7 bar, followed by a decline toward 4 bar over the second half of the shot. That cuts extraction before scorched compounds emerge. Target a shorter ratio, around 1 to 2, for body and roundness without the charred edge that flat pressure tends to exaggerate.
Mistakes to avoid
- Mistaking a flow paddle for pressure profiling: an E61 paddle (Lelit Bianca) sets flow. That is valuable, but do not buy it expecting to steer the bar directly.
- Taking pre-infusion for full profiling: adjustable pre-infusion (Sage Dual Boiler, Linea Micra) shapes only the start of the shot, before the lock to 9 bar. Useful, but not an end-to-end pressure curve.
- Profiling before mastering the basics: without a consistent grind and a stable dose, profiling just adds one more variable to an unsolved problem.
- Expecting a curve to save a poor bean: a stale or badly roasted coffee will disappoint whatever the profile.
- Over-driving the decline: dropping pressure too early or too low thins the body and leaves a weak shot. Build the decline gradually, tasting at each adjustment.
Frequently asked questions about pressure profiling
What is pressure profiling in espresso?
It is varying the pressure on the coffee puck during a single extraction, instead of holding it flat at 9 bar. A typical curve chains a gentle pre-infusion (1 to 4 bar), an extraction peak (6 to 9 bar) and a decline at the end of the shot. At home you achieve it with a manual lever (Cafelat Robot, Flair 58) or by programming (Decent DE1 Pro).
What is the difference between pressure profiling and flow profiling?
Pressure profiling controls the force on the puck (in bar). Flow profiling controls the water volume per second (in ml/s). On an E61 paddle like the Lelit Bianca you set the flow and pressure follows indirectly. On a Cafelat Robot with a gauge you read and drive the real pressure. So a machine can do flow without doing true pressure profiling.
Do you need an expensive machine to pressure profile at home?
No. The most affordable route is a manual lever machine: the Cafelat Robot (around 419 EUR, with gauge) or the Flair 58 (around 630 EUR) deliver genuine pressure profiling by hand. The Decent DE1 Pro (around 3700 EUR) automates programmable curves. Adjustable pre-infusion such as on the Sage Dual Boiler (around 1000 to 1250 EUR) is not full profiling.
What pressure profile suits a light or dark roast?
Light roast: long pre-infusion (8 to 15 seconds at 2 or 3 bar) then a sustained peak around 8 or 9 bar for bright acidity. Dark roast: short pre-infusion then declining pressure (peak at 6 or 7 bar, decline toward 4 bar) to stop before bitterness. These are starting points; grind, dose and freshness remain decisive.
Ready to profile your first curve?
See the Cafelat Robot on Amazon →Further reading: Best manual lever espresso machines 2026 · Best coffee grinders 2026 · Specialty coffee FAQ
Affiliate links: as an Amazon Associate, expertcafe.be earns from qualifying purchases at no extra cost to you. Learn more.